
💡 In this guide, you will choose one meaningful conversion, connect or create the right Pixel, install it safely, and prove that it works.
Clicks tell Meta who is curious. A conversion tells Meta who became a customer or lead. The Meta Pixel is the connection between that completed action on your website and the ads that brought someone there.
First: can you edit the place where the conversion happens?
Your website, form, checkout, booking tool, and email provider may be different services. The Pixel belongs on the webpage or supported server integration where the action finishes. It never goes inside an email.
- I can edit it: follow the platform instructions below.
- Someone else manages it: send them the website-owner handoff in this guide.
- I am not sure: find out who manages your domain, website, checkout, or form. Do not create duplicate Pixels while you investigate.
1. Choose the result that matters
Count the completed result, not the button that starts it.
| Successful action | Conversion event |
|---|---|
| Payment completed | Purchase |
| Qualified enquiry received | Lead |
| Account or form registration completed | Complete registration |
| Appointment confirmed | Book appointment |
| Trial account created | Start trial |
| Subscription started | Subscribe |
| Contact request completed | Contact |
| Product added to cart | Add to cart |
2. Choose the goal in Native
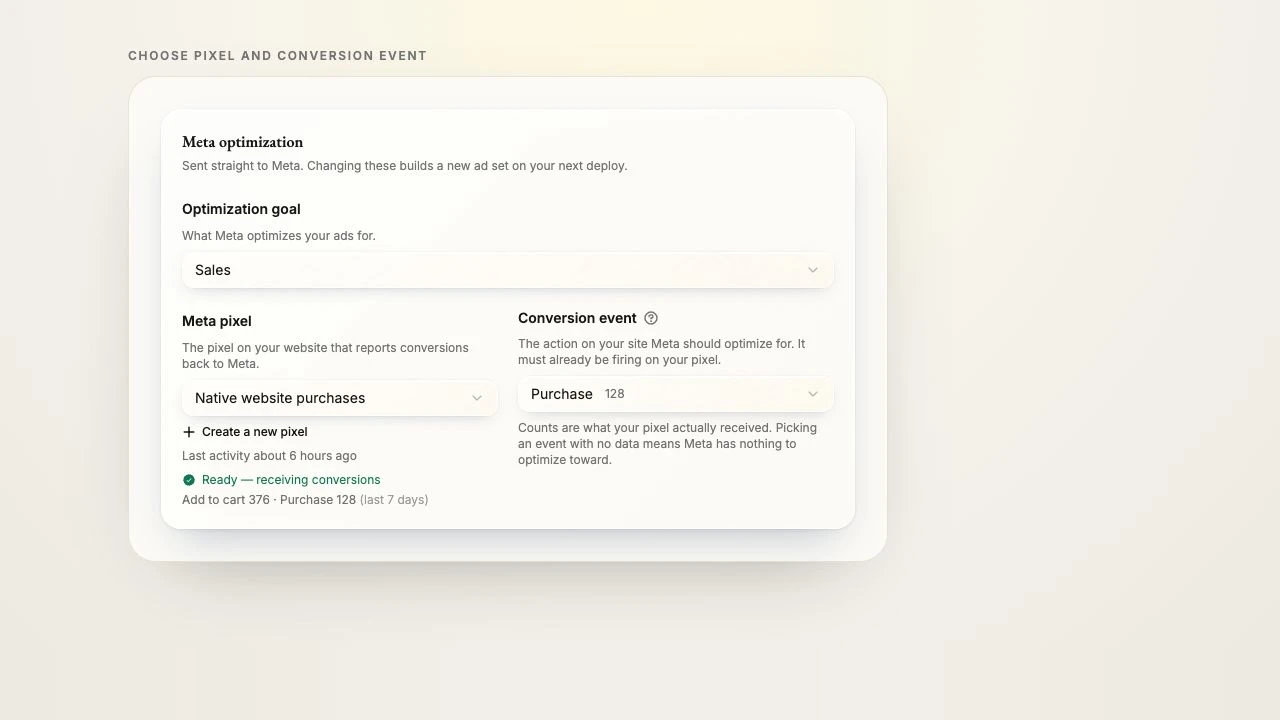
- Go to Branding → Ads → Configure.
- Open Meta optimization.
- Choose Sales for purchases, subscriptions, trials, carts, or registrations. Choose Website leads for leads, applications, bookings, contact requests, trials, or subscriptions.
- The Meta pixel and Conversion event fields now appear.
3. Reuse an existing Pixel—or create one once
Select an existing Pixel when it belongs to this business and website. Choose Create a new pixel only when there is no suitable one. Meta does not let you delete an accidental Pixel, and installing two Pixels can count the same result twice.
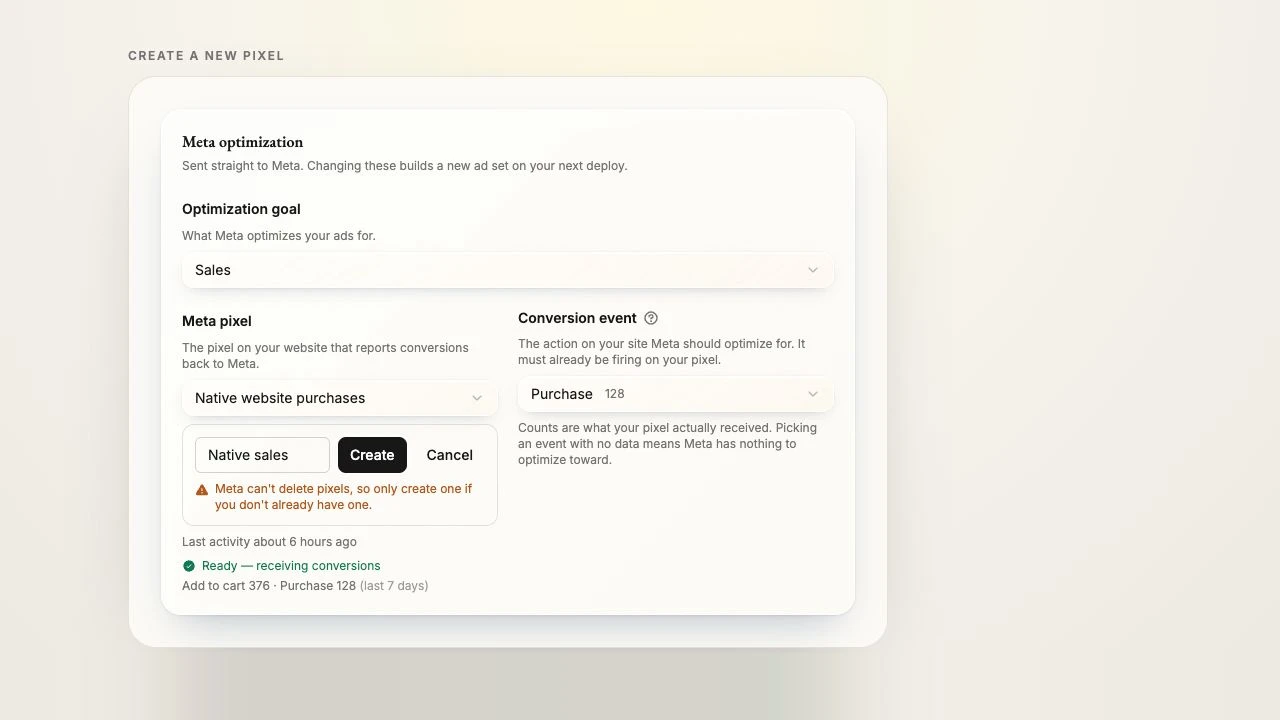
After creation, Native shows the Pixel ID and, for a custom website, the installation code. Copy the ID or pass it to the person who manages the site.
4. Install it in the right place
Use your website platform's own Meta integration when it has one. Do not install the same Pixel through both a platform integration and custom code.
| Your setup | What to do |
|---|---|
| Shopify, WooCommerce, Wix, or Squarespace | Open the platform's official Meta integration and connect or select the existing Pixel. Enter the Pixel ID only if the platform asks for it. Supported integrations can report purchases automatically. |
| Google Tag Manager | Add a Meta Pixel tag with the Pixel ID, set the correct consent and page trigger, then publish the container. |
| Custom website | Give the code from Native to your developer. The base code belongs in the head section of every page. |
| Hosted form, checkout, booking, or email provider | Use that provider's Meta integration when supported. Otherwise, report the result from a confirmation or thank-you page you control. Never place tracking code inside an email. |
Already have a consent banner?
Ask the website owner to place the Pixel in the site's existing marketing or advertising consent category. Do not bypass the privacy choices already shown to visitors.
5. Add the conversion event
Beside Conversion event, open the help. Native gives you three routes:
- Your web platform—the easiest. Supported commerce platforms can send purchase events for you.
- Meta's Event Setup Tool—no code. Open your Pixel in Events Manager, load your site, and identify the successful button or page.
- Your own code. A developer fires the event only after the action succeeds. Money events should include the real value and currency.
6. Prove it works before spending
- Open Test Events from Native's conversion-event help.
- Visit the site as a customer and complete the action once.
- Confirm that the chosen event appears once—not zero times and not twice.
- Return to Native and check the Pixel status.
- Ready — receiving conversions: the selected Pixel has recently received an event this goal can use.
- Installed, but no conversions yet: the base Pixel works, but the result event has not arrived.
- No data received yet: the base Pixel has not fired. Recheck the installation and consent settings.
Meta generally needs around 50 conversions a week to optimize a conversion campaign well. If you are far below that, Traffic can be a better starting goal while you build data.
Copy this to your website owner or developer
Meta Pixel installation handoff
- Website or domain
- Meta Pixel ID
- Conversion event name
- The exact action or confirmation page that means success
- Instruction to fire the event only after confirmed success
- Value and currency for money events
- A short test together in Meta Test Events
Next · Step 3
Choose your budget, daily generation, and how much publishing control you want.